How to Verify a Skrill account in 2020 (Updated)?
If you are here to see the verify procedure, it means to us that you already opened a Skrill account. Now you are looking for the verification procedure. But if you don’t have any Skrill account you can follow our how-to guide of opening a Skrill account? Today we are going to see, how to verify a Skrill account from in 2020?
How to Verify a Skrill account in 2020?
There are four simple steps to verify a Skrill account.
Let’s go through the procedure –
Step#1: Go to the settings:
After opening the new skrill account we were in this page –
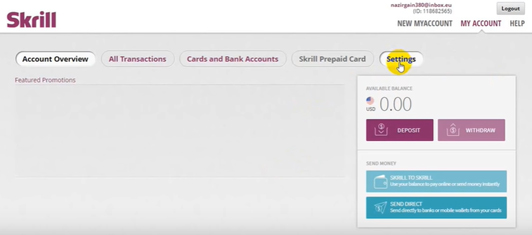
Click the “Settings” and you will drive to the “Manage your settings” interface like this-
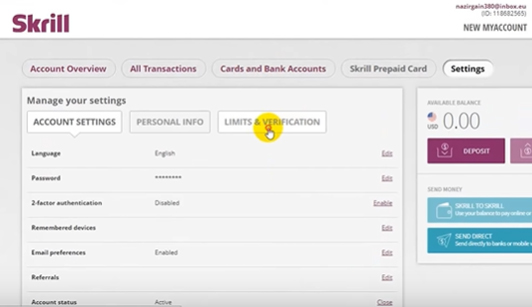
Here we have to click on the “Limit & Verification” tab-
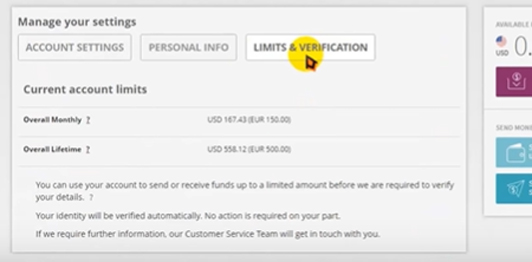
After clicking the tab here we cannot see any verification option to verify our new Skrill account.
So, what we need to do is – we have to log out and log in to our account.
After “Logging in” the account we will see the account interface like this –
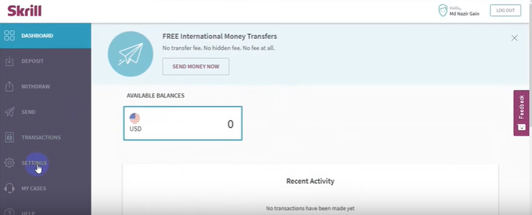
Click on the “SETTINGS” from the left side menu bar. Then we can see the verification option
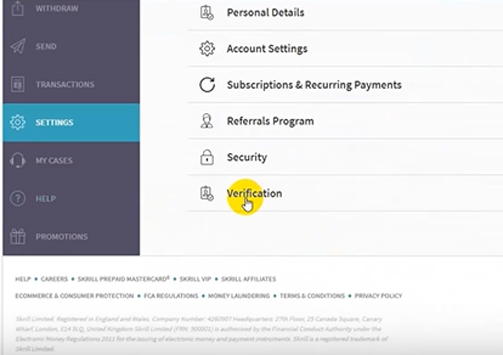
Click on the “Verification” option. You can see a drop-down with the clickable portion called “VERIFY NOW”.
So. Without wasting any time click “VERIFY NOW”. It will bring you the verification interface.
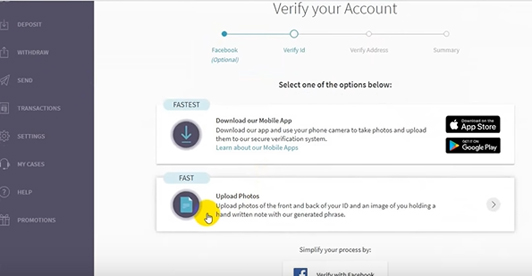
Now, Click “Upload Photos” to verify by uploading the documents.
Step#2: Verify your Account:
The “Verify Id” section will appear.
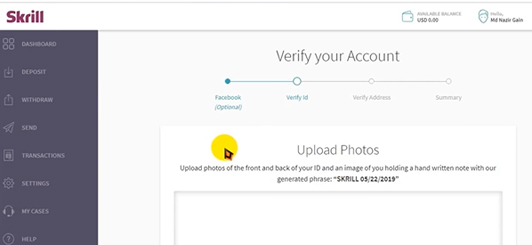
Here you must upload the photo of –
- Front & Back part ID (Nation ID/Driving License/passport)
- An image that you holding written note like “SKRILL mm/dd/2020” (its a generated phrase)
Then select the country and ID type like this
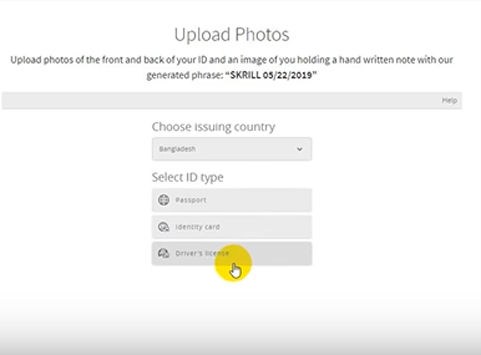
Submit the identity card option will appear.
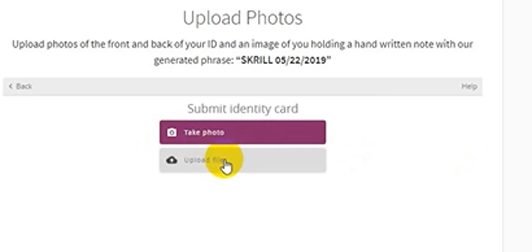
Click “Upload Photo”
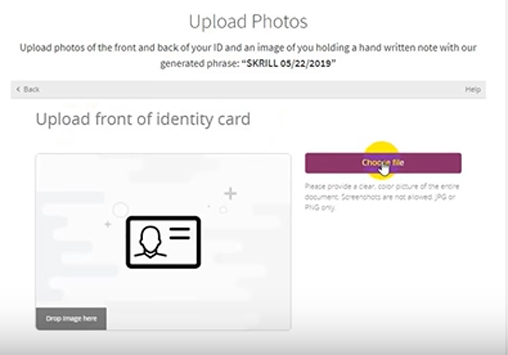
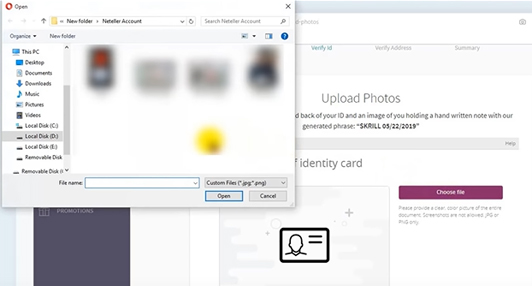
Click “Choose File” and select the front part of your ID card like this
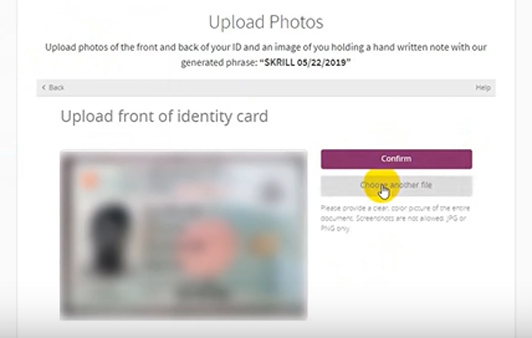
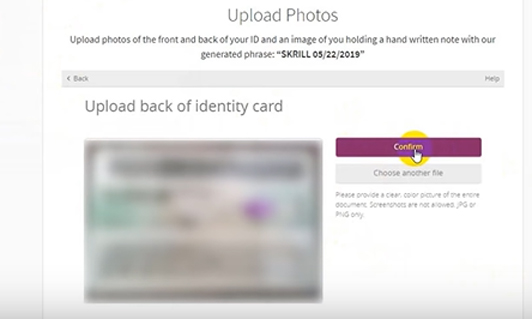
The same way you can upload the back part of the identity card. To do that click “Confirm”.
The back of the ID card Uploading option will come out like this
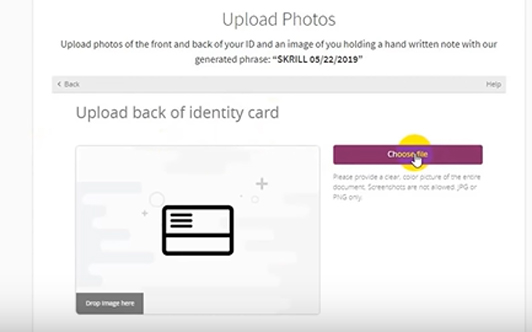
Again, upload the back part of your ID card as you did for the front part.
Then click “Confirm”.
After clicking confirm a holding note image uploading option will appear –
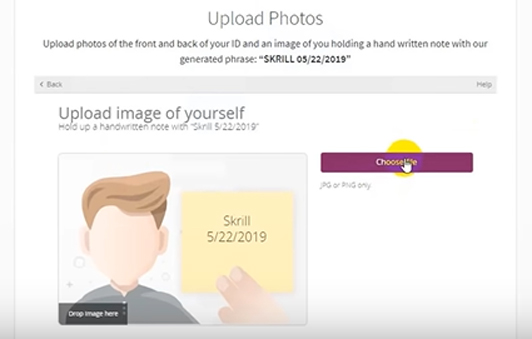
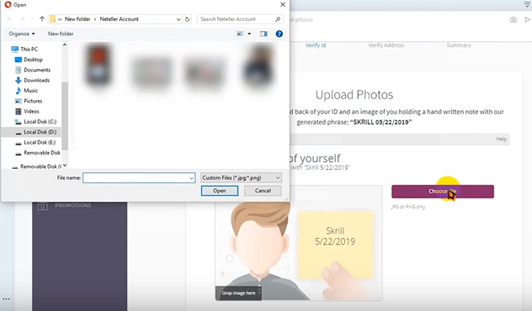
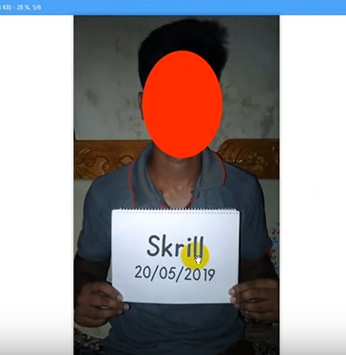
Click “Choose file” and Upload the image like below.
You have to hold the generated note provided by Skrill and take a photo.
i.e.
After uploading all images, click the “Confirm” button.
You will be shown a notification like this –
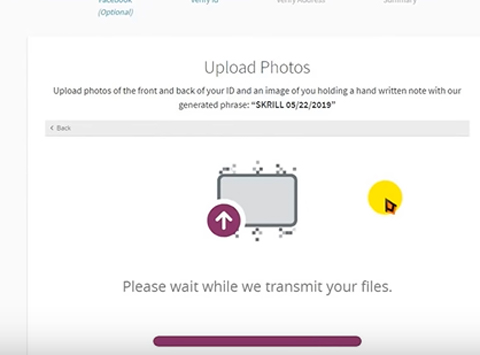
Here they are transmitting the files and,
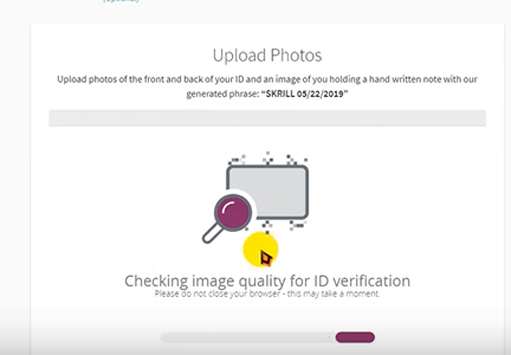
They are checking the image quality for ID verification. When the ID veridiction is done then they notify you that he documents submitted –
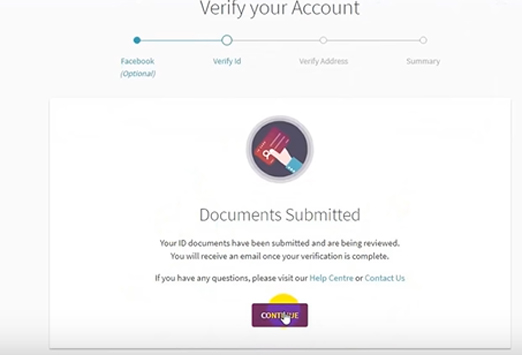
Now click on “CONTINUE” to verify your address. Start in here-
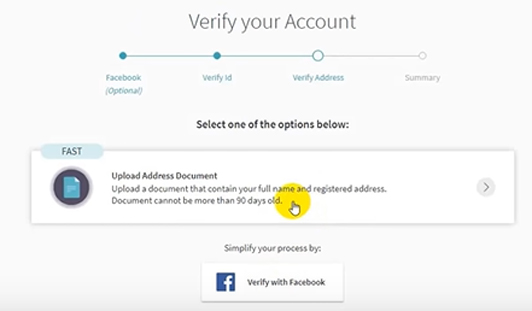
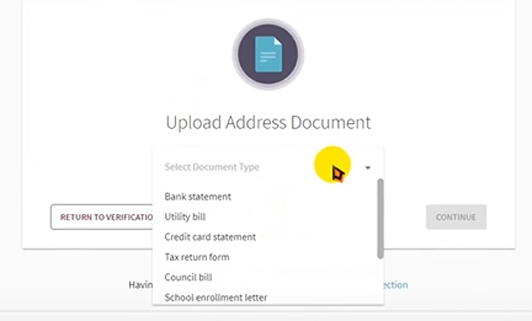
After clicking the “Upload Address Document”, you will get the interface to select the type of address document.
From all of the options let’s work with the utility bill.
So select the “Utility bill” and click on “CONTINUE”
The “Upload Address Document” has to be valid for the past 90 days.
The interface to upload the Utility bill will appear-
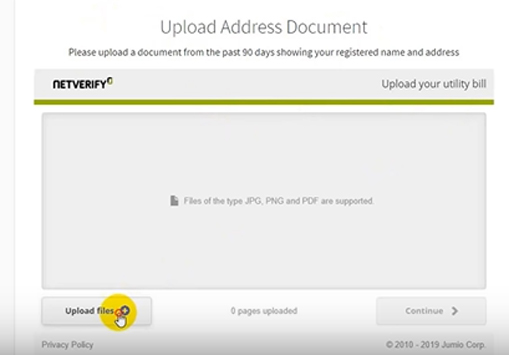
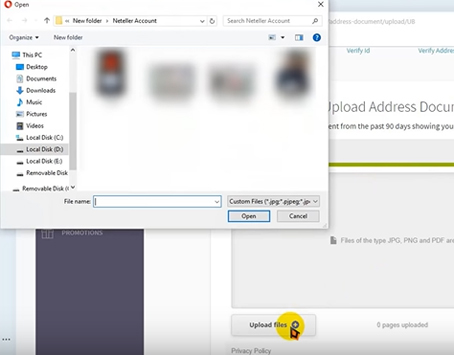
Upload the file as previous we did,
To submit the utility bill click “Continue”.
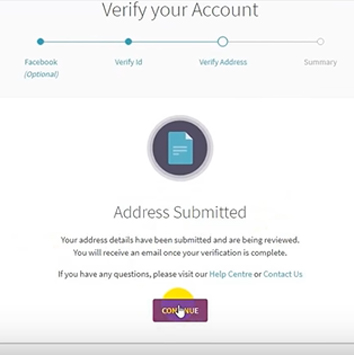
A notification will appear about your address document is submitted successfully.
Click “CONTINUE” for going to the summary of this whole verification process,
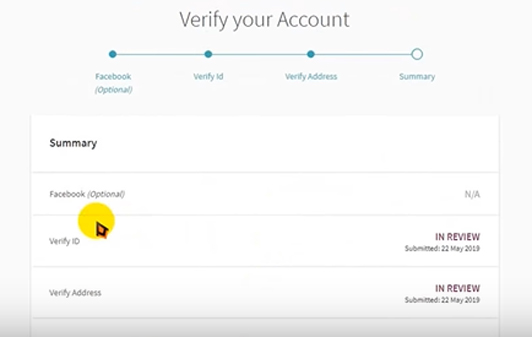
Step#3: Summery and Email about verification:
Here it’s mentioned that the ID card and the address document are “IN REVIEW”.
After a proper review, Skrill will send an email to notify you that is
“Your Skrill account has been verified”
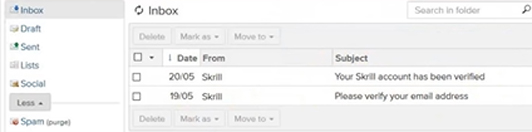
Now you can use your verified Skrill account.